• About
  • Blog
  • Classes
  • Contact
  • Cart
    • Email
    • Instagram
    • Pinterest

Colie's Kitchen

Colie's Kitchen is a professional kitchen in Logan, Utah offering cake classes and more!

  • Breakfast
  • Lunch
  • Dinner
  • Appetizers
  • Soups & Salads
  • Dessert

Swiss Alps Mac & Cheese

February 16, 2021 by Colie

I personally am not a fan of a huge detailed story to go along with a recipe… I know it helps your website and all, but not going to lie…I’m not about it! But I will share something about this that you MUST know! I HATE stringy Mac & Cheese. Like, I hate it. Its hard to eat, and its just not as yummy as a creamy base sauce. My biggest goal with this was to make it not stringy AT ALL! And I succeed! You can thank me by making it yourself and tagging me in a picture! One thing that makes this not stringy is the cheeses I use! I know they are more expensive cheeses, but it’s worth it! I know you and your loved ones will LOVE and DEVOUR this! I hope you love it!

Swiss Alps Mac & Cheese

A few years ago, I was on vacation in Switzerland. We were up in the Swiss Alps for the day and we came upon a quiet little restaurant in a small mountain village. We stopped and ate there, and I thought I was being boring by ordering the mac and cheese….NOT BORING AT ALL! It was the best thing I have EVER eaten! I took some serious mental notes and was determined to recreate it when I got home. And I am thrilled to say I FINALLY got it down! It's super basic in the seasonings department, it's mostly flavored by the simple ingredients and salt and pepper. You will love this mac and cheese. A TRUE gormet style comfort dish! I hope yopu enjoy!
Print Recipe
Prep Time 30 mins
Cook Time 30 mins
Total Time 1 hr
Course Dinner, Main Course
Cuisine Swiss
Servings 10

Ingredients
  

Swiss Alps Mac & Cheese

  • 1 tbsp olive oil
  • 1 sweet onion chopped
  • 3 cloves garlic minced
  • 2 tbsp flour
  • 2 cups milk higher fat content
  • 2 tsp chicken boullion I use "Better than boullion"
  • 2 cups half & half
  • 2 cups baby swiss cheese shredded
  • 2 cups havarti cheese shredded
  • 1 cup fontina cheese shredded
  • salt and pepper to taste
  • ½ lb Deli ham (should be about three slices) Slice edge off and cut into bite size pieces. Ask for it sliced to a quarter inch
  • 5 large Yukon gold potatoes washed, peeled, chopped (bite size), and cooked to tender.
  • 1 lb rigatoni pasta cooked—I use rummo brand from Lee's (could use penne)
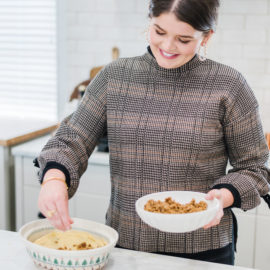
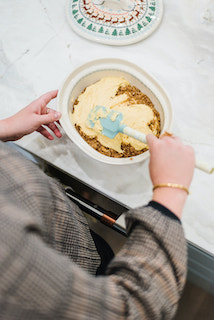
  • ½ cup frenchs dried onions crushed into crumbs

Instructions
 

For the Cheese Sauce

  • Make sure all veggies are chopped, potatoes are cooked to tender, you've cut the edges off of your ham, and cut it into bite size pieces. Shred your cheeses. Have everything prepared and ready to go! It will make the process a lot quicker and easier!
  • Boil water in a pot over high heat. Have it boiling when you're ready to begin sauce. Once ready, add pasta to water and cook to "Al Dente". Drain water out of pasta and set aside.
  • While noodles are boiling, add olive oil to a large pot over medium heat. Add in onions, garlic, and some salt and pepper- cook until soft and tender. Add in flour and stir. Add milk, half & half, and chicken bouillon, whisk. Cook mixture while stirring for about 3 minutes to bring the temperature up.
  • Slowly (SLOWLY!!!) whisk in the shredded cheeses. Stir until completely melted and creamy. If you feel like your sauce needs to be slightly thinner, add in a little bit more milk. Continue to stir sauce for a few more minutes until creamy and hot! Taste and season with salt and pepper if needed.
  • Add in (drained) noodles, cooked potatoes, and ham. Stir until everything is coated with sauce. Transfer mixture into an oven safe dish, and top with crushed dried onions. Cook at 350 for 20 minutes or until crumbs are golden and sauce is bubbling.
  • Enjoy!!
Keyword Cheese, comfort, Mac & Cheese, pasta

Filed Under: Dinner

Coconut Cake w/ Coconut Lime Glaze and Coconut Whipped Cream

February 15, 2021 by Colie

I will save you the long description of this cake, and let you get right to the recipe!! It’s that good you can’t WAIT to whip it up yourself! Pictures of my cream of coconut and coconut milk are down at the bottom of post!

Print Recipe

Coconut Cake w/ Coconut Lime Glaze and Coconut Whipped Cream

Light and fluffy cake with the slightest hint of coconut. Topped with a limey glaze so perfect your tastebuds wont know how to handle it! And you can't forget a dollop of the most perfect coconut whipped cream. All subtle flavors, but they create the most amazingly light dessert! I like it best served warm but its amazing cool too!
Print Recipe Pin Recipe
Prep Time 15 mins
Cook Time 35 mins
Total Time 50 mins
Course Dessert
Cuisine American
Servings 10 people

Ingredients
  

For the Coconut Cake

  • 3 cups flour
  • 2 cups sugar
  • 1½ tsp salt
  • 1½ tsp baking powder
  • 1½ cups coconut milk shake can before opening
  • 2 tsp vanilla
  • ¼ cup cream of coconut white bottle found in drink section of store
  • Juice of 1 lime
  • ½ cup vegetable oil
  • ¾ cup egg whites whipped to stiff peaks

For the Coconut Lime Glaze

  • ¼ cup lime juice
  • ¾ cup sugar
  • 1 tsp vanilla
  • 2-3 tbsp cream of coconut white bottle found in drink section of store
  • zest of 1 lime

For the Coconut Whipped Cream

  • 2 cups heavy whipping cream
  • ¼ cup cream of coconut white bottle found in drink section of store
  • ½ cup powdered sugar
  • 2 tsp vanilla

Other Ingredients

  • sugar to sprinkle on top of glazed cake
  • Shredded coconut for top of cake slice
  • lime zest for top of cake slice

Instructions
 

For the Coconut Cake

  • Pre heat oven to 350°. Generously spray a 9 by 13 dish.
  • In a large bowl, whisk together flour, sugar, salt, and powder to sift. Set aside.
  • In a small bowl, mix together coconut milk, vanilla, cream of coconut, lime juice, and oil. set aside.
  • In a separate clean bowl, add egg whites. beat with a hand mixer until stiff peaks form. About 5 or so minutes. You should be able to turn your bowl upside down without spilling. (be careful with that test ;))
  • Add ½ of wet mixture to dry mixture, fold. Add other ½ of wet to the dry and mix until all combined. Once combined, gently fold in ⅓ of egg whites to batter, once mixed, add in the rest of the egg whites and carefully fold until no white streaks are left. BE GENTLE!!! This step is what makes the cake so soft and fluffy.
  • Pour batter in prepared dish, bake for 35 minutes, or until top is golden brown and a toothpick comes out clean.
  • Let cake cool for 5 minutes before glazing.

For the Coconut Lime Glaze

  • In a small pot over medium heat, combine all ingredients. Stir and heat until the sugar is completely dissolved. Take off heat and set aside until ready to glaze cake.
  • Glaze top of cake with ALL of the glaze! It might seem like a lot at first, but as glaze settles and cake cools, it will start to seep down into the cake and it's DELICIOUS!
  • Sprinkle top of glaze with a little bit of sugar. Creating a sugary crust!

For the Coconut Whipped Cream

  • In the bowl of a stand mixer, fitted with whisk attachment.. add cream, powdered sugar, cream of coconut, and vanilla. Beat on high for 3-5 minutes, or until stiff peaks form.
  • Top individual slices of cake with a dollop of cream. Sprinkle shredded coconut and lime zest on top! I love it best served slightly warm!
Keyword cake, coconut, lime, whipped cream

This is the Cream of Coconut. I find this by the specialty drink mixes in the grocery store.

My preferred coconut milk. I ALWAYS shake the can well before measuring. Do NOT use the coconut milk in the milk cartons (near the regular milk) you won’t get as much of a coconut flavor.

Filed Under: Dessert

Easy and Crisp Go-To Salad with Honey Basil Vinaigrette

February 2, 2021 by Colie

Easy and Crisp Go-To Salad with Honey Basil Vinaigrette

This salad is pure heaven! Make it for your family, or take it to a dinner party, and everyone will love you! Every ingredient pairs perfectly with each other, and the dressing is the cherry on top! You will love it!
Print Recipe
Prep Time 20 mins
Total Time 20 mins
Course Salad
Cuisine American
Servings 6 people

Ingredients
  

Honey Basil Vinaigrette Dressing

  • 1 cup canola oil
  • ¼ cup olive oil extra virgin
  • ¾ cup honey
  • 2 tbsp dijon mustard
  • ¾ cup white vinegar
  • 3 cloves Garlic minced
  • 1 tbsp dried basil leaves heaping
  • ½ tsp thyme powder
  • ½ tsp dry mustard
  • salt & pepper to taste

Salad Ingredients

  • Iceberg Lettuce washed, dried, and chilled
  • Romaine Lettuce washed, dried, and chilled
  • Spinach washed, dried, and chilled
  • 1 cup green onions chopped
  • 1 cup Craisins
  • 1 cup Crispy Fried Onions
  • ½ cup bacon bits Store bought, or cooked at home
  • 1 cup fresh feta cheese
  • 1 cup honey roasted walnuts or almonds will do!
  • 1 cup croutons your favorite kind!

Instructions
 

Honey Basil Vinaigrette

  • Mix all ingredients in a blender until smooth.

Salad Assembly

  • Chop Lettuce into bite size chunks. Top with all the toppings and toss before serving. I prefer to serve with dressing in a container on the side so the salad doesn't get soggy!
Keyword Bacon, basil, Cheese, crasins, Feta, garlic, honey, salad, vinegar

Filed Under: Dinner, Lunch, Soups & Salads

Cream Cheese, Heath, and Salted Caramel Apple Dip

February 2, 2021 by Colie

Cream Cheese,Heath, and Salted Caramel Apple Dip

They say "an apple a day keeps the Dr. away"… but they never said a fluffy caramel dip wasn't allowed! This dip is the perfect mix of salty and sweet, creamy and crunch! You will fall in love with this dip and never go back!
Print Recipe
Prep Time 10 mins
Course Appetizer, Breakfast, Dessert, Salad, Side Dish, Snack
Cuisine American

Ingredients
  

  • 1½ cup heavy whipping cream
  • ¾ cup powdered sugar
  • 2 tsp vanilla extract or vanilla bean paste
  • 8 oz cream cheese room temp
  • ½ cup sweetened condensed milk
  • ½ cup heath bits the kind with no chocolate
  • ⅓ cup salted caramel, separated your favorite kind from the store
  • pinch sea salt optional

Instructions
 

  • In the bowl of a stand mixer, fitted with the whisk attachment, whip the cream. Once cream has gotten foamy, add in vanilla and powdered sugar. continue mixing until cream is fully whipped and holds a stiff peak.
  • In a separate bowl, with a hand mixer, mix together the cream cheese and sweetened condensed milk until fully combinded.
  • Fold whipped cream into cream cheese mixture until combined.
  • Add in heath bits, and stir in 1/2 of your salted caramel.
  • Place into your serving bowl, and top with other 1/2 of caramel, another sprinkle of heath, and a little bit of sea salt. Keep in fridge until ready to serve!
Keyword apple, cream cheese, heath, salted caramel, whipped cream

Filed Under: Appetizers, Brunch, Dessert

Light&Fluffy Lemon Fruit Dip

February 1, 2021 by Colie

Light & Fluffy Lemon Fruit Dip

This dip perfectly compliments any fruits! Its easy to make, and even more delicious!
Print Recipe
Prep Time 7 mins
Course Appetizer, Breakfast, Side Dish, Snack
Cuisine American

Ingredients
  

  • ¾ cup heavy whipping cream
  • 2 tsp vanilla extract or vanilla bean paste
  • ⅓ cup powdered sugar
  • 8 oz cream cheese room temp
  • 6-8 oz marshmallow fluff
  • juice and zest of 1 lemon

Instructions
 

  • In the bowl of a stand mixer fitted with the whisk attachment, whisk the heavy cream. Once cream has started to thicken, add in vanilla and powdered sugar. Keep mixing for about 3 more minutes, or until cream is set and forms stiff peaks.
  • In a separate bowl, mix together the cream cheese and marshmallow fluff (with a hand mixer) until creamy. Add in lemon zest and juice. Mix until combined
  • Fold whipped cream into lemon mixture until fully combined. Keep in fridge until ready to serve.
Keyword fruit dip, lemon, marshmallow, whipped cream, zest

Filed Under: Appetizers, Breakfast, Brunch, Dessert, Dinner

Easy French Baguettes

January 20, 2021 by Colie

Easy French Baguettes

If you are looking for the EASIEST and YUMMIEST homemade baguette recipe… look no farther. You have found it! This recipe is adapted from the food nanny's recipe. I made a few adjustments to better fit my liking!
Print Recipe
Prep Time 10 mins
Cook Time 15 mins
Resting Time 15 mins
Total Time 40 mins
Course Dinner, Side Dish, Snack
Cuisine French

Ingredients
  

For the yeast mixture

  • ½ cup Warm water like a baby's bath or bottle
  • 1 ½ tbsp active dry yeast heaping
  • 1 tsp sugar

For the rest

  • 3 cups all-purpose flour have more on hand incase your dough is too wet!
  • 1 tsp sugar
  • 1 ½ tsp salt try to get a good high quality salt
  • 1 cup warm water like a baby's bath or bottle

Instructions
 

  • In a small bowl, measure out ½ cup warm water. Whisk in yeast and sugar. Cover, and set aside to rise. Once you can see bubbles, it is active and ready!
  • In a large bowl, mix together flour, sugar, and salt. Add in active yeast mixture and stir in until mostly combined.
  • Slowly add in the warm water. Once water is all in, if the dough is too sticky add in some flour. ¼ cup at a time until dough comes off the edge of the bowl.
  • On a lightly floured surface, knead dough until smooth and elastic. Cut into three even pieces. Form a hot dog-like shape with first piece, pinch the edges together. Starting from the center, roll into a long log, the length of your baguette pan. Repeat with other two pieces.
  • If you have a baguette pan, use that! If not, shape a sheet of tin foil into two or three cradels, place on top of a wire cooling rack. Poke holes with a toothpick all along the bottom of the tin foil to create a vent system. Spray pan, or tin foil. Place baguettes in their slots. With a sharp knife, cut a slit down the middle of the baguette. Cover with a dish rag and set aside.
  • Place a cookie sheet on the bottom rack of your oven. Fill with water. Preheat oven to 450°
  • Once oven is fully heated, place baguettes on middle rack in oven and cook for about 10-15 minutes, or until crispy and golden brown.
Keyword bread, yeast

Filed Under: Appetizers, Brunch, Dinner, Lunch, Soups & Salads

Italian Chili

January 20, 2021 by Colie

Jump to RecipePrint Recipe

This recipe has been one of my most requested recipes lately! And I’m finally getting around d to sharing it! Not only is it definitely one of the prettiest soups I’ve ever created, it’s SO delicious! You will love the way the colored potatoes look, and the fun new flavor they add. If your store doesn’t have the multi colored potatoes, any potato will work! I hope you enjoy!

Italian Chili

This hearty Italian chili is perfect for any cold night! I like to say it's the combination of white chicken chili, and olive gardens Zuppa Toscanna Soup! Gauranteed you will LOVE this Chili!
Print Recipe Pin Recipe
Prep Time 20 mins
Cook Time 1 hr
Total Time 1 hr 20 mins
Course Soup
Cuisine Italian
Servings 8 people

Ingredients
  

Italian Chili

  • 1 tbsp olive oil
  • 1 sweet onion chopped
  • 2-3 cloves garlic
  • 1 cup celery finely chopped
  • 12 oz Italian sausage (or more, depending on the package you buy)
  • 12 oz sweet italian sausage (or more)
  • 3-4 cups Multi colored potatoes washed & chopped into bite size chunks
  • 4 cups chicken broth
  • 1 tsp cumin
  • 1 tsp chili powder
  • ¼ tsp cayenne pepper
  • 1 tsp thyme
  • 1 tsp basil leaves
  • 3 cans northern beans drained and rinsed
  • ¾ cup heavy cream
  • 1 ½ cups milk prefered percentage
  • 2 cups arugula chopped
  • salt, peper, and garlic powder to taste
  • Fresh grated parmesean cheese to top

Instructions
 

  • In a large pot, cook the onion in olive oil for a few minutes, until tender. Add garlic and celery and cook for 3-5 minutes.
  • Add in both sausages and cook over medium high heat until sausage is browned.
  • Add chopped potatoes stir to combine. Cook for a little longer, then add the chicken broth.
  • Bring mixture to a low boil, and add all spices and beans. Continue cooking for abut 3 minutes.
  • Turn down heat and whisk in cream and milk.
  • Let cook on low until potatoes are tender and can easily be poked with a fork.
  • Turn heat down to a simmer. Add in arugula. Taste the soup and add any spices you think it needs. If its too thick, add more chicken broth or milk.
  • Serve hot with fresh parmesean cheese on top! I love this with my homemade baguettes! ENJOY!
Keyword arugala, beans, chili, Potato, sausage

Filed Under: Dinner, Lunch, Soups & Salads

Mom’s Fluffy Cinnamon Rolls

November 16, 2020 by Colie

Jump to RecipePrint Recipe

If you are looking for a staple cinnamon roll recipe you’re in luck! These are the perfect rolls. Fluffy, gooey, and perfectly delicious in every way! I know you’ll love them as much as I do.

Mom's Fluffy Cinnamon Rolls

Nothing says "Good Morning" like waking up to a fresh batch of cinnamon rolls. My mom has perfected the art of cinnamon rolls. Perfectly fluffy yet gooey-with the most delicious icing on top. Warm or cold, these are the best things EVER! This recipe is actually my moms dinner roll recipe that she makes into cinnamon rolls. So if you're looking for a great dinner roll recipe, use this one! (minus the cinnamon and sugar, or course)
Print Recipe Pin Recipe
Prep Time 1 hr
Cook Time 17 mins
Resting Time 2 hrs
Total Time 3 hrs 17 mins
Course Breakfast, Dessert
Cuisine American
Servings 24 people

Ingredients
  

Dough

  • ½ cup butter salted
  • 2 cups milk
  • 1 cup water warm (115°-120°)
  • 3 tbsp active dry yeast heaping
  • 2 tbsp sugar
  • ½ cup sugar
  • 1 tbsp salt
  • 7-8 cups flour divided
  • 3 eggs beaten

Cinnamon Sugar Filling

  • ½ cup butter salted, melted
  • 2 cups sugar
  • ⅛-¼ cup cinnamon Mix with sugar-set aside

Vanilla Icing

  • 2 tbsp butter softened
  • 1 tsp vanilla high quality
  • 4 cups powdered sugar
  • 4 tbsp milk more or less depending on desired consistency

Instructions
 

Dough

  • Combine milk and butter in small sauce pan. Warm on medium heat until butter is melted and mixture is close to reaching a boiling state. Let cool to 115°-120° degrees.
  • In your warm water, add yeast and 2 tbsp sugar. Mix with whisk, cover and let rest until doubled in size. Once its bubbling, you know the yeast is working! (If no bubbles are forming after a few minutes, start over with yeast!)
  • While milk is coolng, and yeast is rising, add ½ cup sugar, salt, 4 cups flour, and eggs to the bowl of a stand mixer fittled with the dough hook. Mix slightly.
  • Add yeast mixture and warm milk. Mix well, stopping once to scrape the sides of the bowl. Mix again until well blended.
  • Let rest for 15 minutes.
  • Add 3-4 more cups of flour ½ cup at a time. mixing in between additions. YOu know youre dine adding flour when dough start to come together and pull away from the side of the bowl. (it will be slightly sticky)
  • Spray a large bowl with cooking spray, and place dough inside. Cover with a cloth and let rise for 1 hour.
  • Once risen, punch dough down and let rise another 30-40 minutes. Once risen, punch down again and let rest for 15 minutes.
  • Flour your clean counter top. Divide dough in half and place half on floured surface. Roll out into rectangle shape about ¼ inch thick. Brush ½ melted butter on rolled out dough. Sprinkle ½ of cinnamon mixture on top. Tightly roll dough (start rolling with the long side of the rectangle-the roll will be long!)pinch seam closed. Slice into 1½-2 inch slices. Repeat with other half of dough.
  • Pre heat oven to 350° F. Line 2 cookie sheets with parchment paper. Place rolls about 2 inches apart. Let rolls rise 20-30 minutes. Bake for 17 minutes, or until edges start to lightly brown.

Vanilla Icing

  • Mix all ingredients until smooth.
  • Once rolls are coled to room temp. spread icing all over rolls!
  • Serve room temp, or slightly warm! ENJOY!

Notes

Keyword bread, breakfast, cinnamon, cinnamon rolls, yeast

Filed Under: Breakfast, Brunch, Dessert

Christmas Morning Breakfast Cake

November 6, 2020 by Colie

Jump to RecipePrint Recipe

Christmas Morning Breakfast Cake

I have never had a better breakfast (coffee) cake! This recipe has been in my family for YEARS! Infact, I cant remember life without it! Waking up to the smell of this baking in the oven on christmas morning is hands down the best smell EVER! Of course, you can have this at any time of the year. We have it for the Fourth of July, Easter, Thanksgiving, or Conference weekends!
Print Recipe Pin Recipe
Prep Time 15 mins
Cook Time 45 mins
Total Time 1 hr
Course Breakfast
Cuisine American
Servings 6 people

Equipment

  • 8" square pan

Ingredients
  

Batter

  • ½ cup salted butter softened
  • 1 cup sugar
  • 2 eggs
  • 1 cup sour cream can sub with plain greek yogurt
  • 1½ cups flour
  • 1 tsp baking soda
  • ½ tsp baking powder
  • dash salt
  • 1½ tsp vanilla high quality

Crumb Topping

  • 1 cup brown sugar packed
  • 4 Tbsp flour
  • 4 tsp cinnamon
  • 4 Tbsp butter melted

Instructions
 

Batter

  • In the bowl of a stand mixer, beat together the butter and sugar until combined and fluffy.
  • Add in eggs and lightly mix until barely combined.
  • Mix in sour cream.
  •  In another bowl, combine flour, baking soda, baking powder, and salt.
  • Add dry mixture to the wet mixture. Once combined, stir in vanilla (a little more vanilla than what it calls for will NEVER hurt ;)) 

Crumb Topping

  • For the crumb topping, combine all ingredients to form a crumble (the texture of damp sand).

Assembly and Baking

  • Preheat oven to 350. Grease an 8” square pan with cooking spray.
  •  Pour half of the batter in the pan and spread evenly. Sprinkle with half of the crumb mixture, and spread so it covers all of the batter.
  • Carefully spread remaining batter on top of the crumb layer (try not to mix it in, lightly spread) Keep the layers as separate as possible. Cover the whole thing with the remaining crumb mixture. 
  • Bake for 45 minutes or until the center isn’t wobbly (toothpick comes out clean). Once out of the oven, let sit for about 10 minutes before serving. My family likes to spread warm butter on top. You will love this delicious family recipe! 
Keyword breakfast, cake, cinnamon, sour cream

Filed Under: Breakfast, Brunch

Strawberry Shortcake Cookies

October 1, 2020 by Colie

These cookies are the most delicate and dainty treat you can make! They are little bites of heaven! I love making these for any kind of party or shower. They are simply beautiful. 

This recipe comes from my mom. She always makes the best cookies. If there’s ever a good cookie recipe, chances are it came from my mom! Though the dough requires a little bit of work and maybe some muscle power, it is worth it! My mom is such an example of baking with love and devotion. Every time I make these cookies, I think of her!

I always recommend reading the recipe all the way through before starting! Just to avoid any problems and so you know what you have ahead of you! 

Strawberry Shortcake Cookies

Colie
Print Recipe
Prep Time 2 hrs
Cook Time 20 mins
Total Time 2 hrs 20 mins
Course Dessert
Cuisine American
Servings 12 people

Equipment

  • Oven
  • Stand Mixer

Ingredients
  

Cookie Dough

  • 2 Cups Flour
  • ½ Cup Sugar
  • Dash Salt
  • ⅔ Cup Butter Cold
  • 2 tbsp Water Cold
  • 1 tsp Vanilla High quality

FRESH STRAWBERRY FROSTING

  • ½ Cup Butter Softened
  • ¾ Cup Strawberries Fresh, sliced
  • 2 tbsp Milk
  • 5 Cups Powdered Sugar
  • 1 tsp Vanilla High quality
  • Additional strawberry slices and mint leaves for decorating

Instructions
 

Cookies

  • Pre heat oven to 325 degrees F and line cookie sheet with parchment paper.
  • In a large bowl, combine the flour, sugar, and salt. 
  • Cut in butter until mixture resembles coarse crumbs. 
  • Combine water and vanilla and stir into crumb mixture until just moistened. Cover and refrigerate for 1-2 hours (until firm).
  • Dump dough mixture out on a lightly floured surface. The dough will be very crumbly at this point. Work the dough together for about 10 minutes. (It seems like it will never come together, but stick with it IT WILL!)
  • Roll out dough until its about 1/4 inch thick. Cut with a floured cookie cutter, (don’t twist while cutting)
  • Place cookies 1 inch apart on cookie sheet lined with parchment paper. 
  • Bake for 15-20 minutes, or until golden brown. Cool for two minutes on the cookie sheet, then transfer to cooling rack to cool completely.

Frosting

  • In a stand mixer, mix the butter, milk, and strawberries together. Slowly add the powdered sugar, one cup at a time. Ending with adding the vanilla. Keep frosting stored in the fridge until ready to frost. 
  • Frost the COMPLETELY COOLED cookies with the strawberry frosting. Decorate with one slice of strawberry and mint leaf. 
Keyword cookies, strawberry

Filed Under: Dessert

  • Newer Entries
  • 1
  • 2
  • 3
  • 4
  • Previous Entries

Recent Posts

  • Southern Pecan Pie
  • Brown Butter Apple Pie
  • Key Lime Pie
  • Fool Proof Flaky Pie Crust
  • Pumpkin Chocolate Chip Cake with Cheesecake Filling and Cream Cheese Buttercream

Categories

  • Appetizers
  • Breakfast
  • Brunch
  • Dessert
  • Dinner
  • Lunch
  • Soups & Salads
  • Uncategorized

WELCOME

WELCOME

Whether you're here to book a class, make an order, or find the perfect recipe, WELCOME! Colie's kitchen is based on love and friendships old and new. Pull up a chair, put on your apron, and let's get cooking!

FOLLOW ME

  • Instagram
  • Pinterest

CATEGORIES

  • Appetizers
  • Breakfast
  • Brunch
  • Dessert
  • Dinner
  • Lunch
  • Soups & Salads
  • Uncategorized

GET UPDATES

Enter your email to receive new recipes and tips!

Follow on Instagram

GET UPDATES

Enter your email to receive new recipes and tips!

  • Email
  • Instagram
  • Pinterest

COPYRIGHT © 2020. Emma Theme by Lovely Confetti · DMCA.com Protection Status

We use cookies on our website to give you the most relevant experience by remembering your preferences and repeat visits. By clicking “Accept”, you consent to the use of ALL the cookies.
Cookie settingsACCEPT
Privacy & Cookies Policy

Privacy Overview

This website uses cookies to improve your experience while you navigate through the website. Out of these, the cookies that are categorized as necessary are stored on your browser as they are essential for the working of basic functionalities of the website. We also use third-party cookies that help us analyze and understand how you use this website. These cookies will be stored in your browser only with your consent. You also have the option to opt-out of these cookies. But opting out of some of these cookies may affect your browsing experience.
Necessary
Always Enabled

Necessary cookies are absolutely essential for the website to function properly. This category only includes cookies that ensures basic functionalities and security features of the website. These cookies do not store any personal information.

Non-necessary

Any cookies that may not be particularly necessary for the website to function and is used specifically to collect user personal data via analytics, ads, other embedded contents are termed as non-necessary cookies. It is mandatory to procure user consent prior to running these cookies on your website.